The React Suspense Composable Streaming Trick For Improved User Experience

The React Suspense Composable Streaming Trick For Improved User Experience
I was building a React app some time ago, and I noticed I had to stare at a blank screen while data loads. That’s not just annoying, it’s a dealbreaker for keeping users engaged.
Today we are going to discuss how to use React’s Suspense to stream data and render UI components smoothly, keeping your app responsive and delightful.Let’s start with a simple example
Here’s a quick code snippet showing Suspense in action for a data-dependent component.

import { Suspense } from "react";let cache = new Map();
export function fetchData(id) {
  if (!cache.has(id)) {
    const delay = Math.floor(Math.random() * 2500) + 1000;
    const promise = new Promise((resolve) => setTimeout(resolve, delay));
cache.set(id, promise);
}
return cache.get(id);
}
function Page() {
  return (
    <div
      style={{
        border: "2px solid black",
        borderRadius: "8px",
        display: "flex",
        gap: "10px",
        alignItems: "center",
        justifyContent: "center",
        padding: "100px",
        margin: "30px",
      }}
    >
      {Array.from({ length: 16 }).map((_, i) => (
        <div key={i}>
          <Suspense fallback={<span>⏳</span>}>
            <SlowCheckmark id={i} />
          </Suspense>
        </div>
      ))}
    </div>
  );
}
async function SlowCheckmark({ id }) {
await fetchData(id);return <span>✅</span>;
}
const App = () => (
  <div>
    <Page />
  </div>
);
export default App;
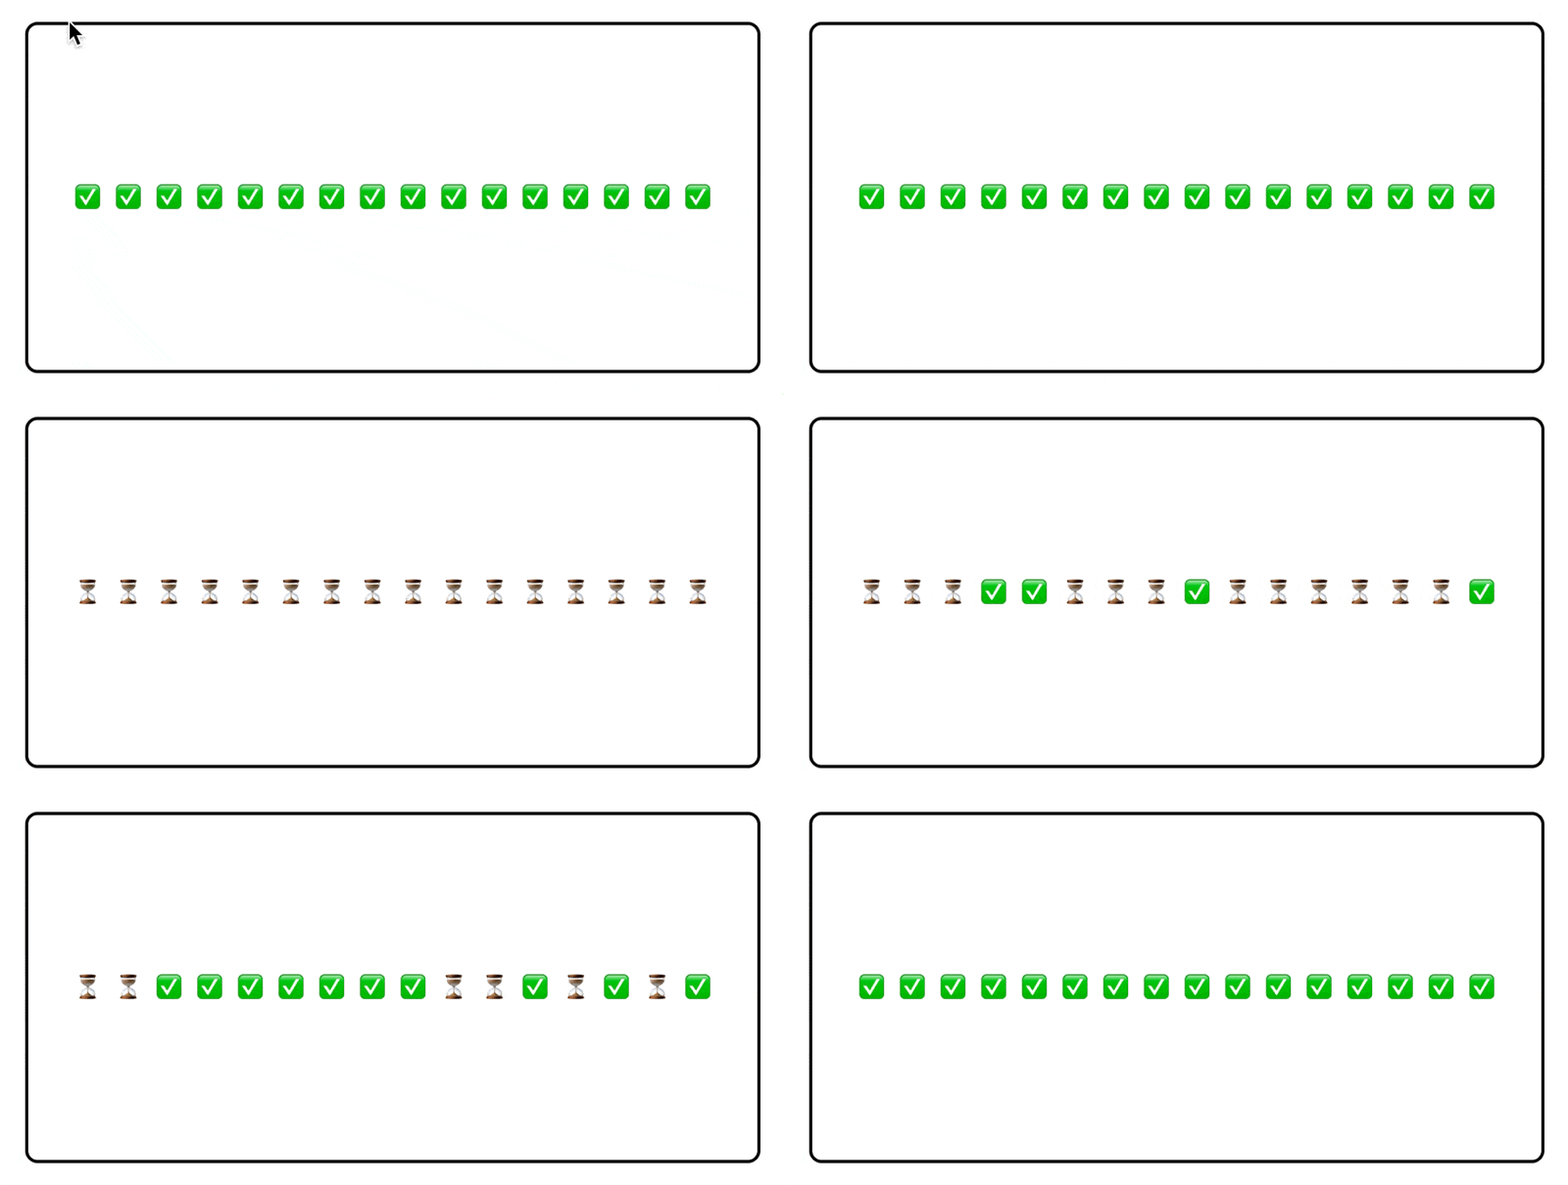
This simple example streams 16 components instances from server to the client. The fallback UI (a simple “Loading…” with a timer emoji) keeps users informed without jarring blank screens.
Why this approach works?
- Non-blocking rendering: The Suspense allows me to render the the rest of your UI while data is being fetched, avoiding a frozen app.
- User-friendly feedback: It shows my fallback UI to inform users about the progress, keeping users engaged during waits.
- Simple integration: The best part is that using it is very simple. I just wrap components in
Suspensewithout rewriting my data-fetching logic. These features make the app feel faster and more polished, even on slow networks.
A cool real world example
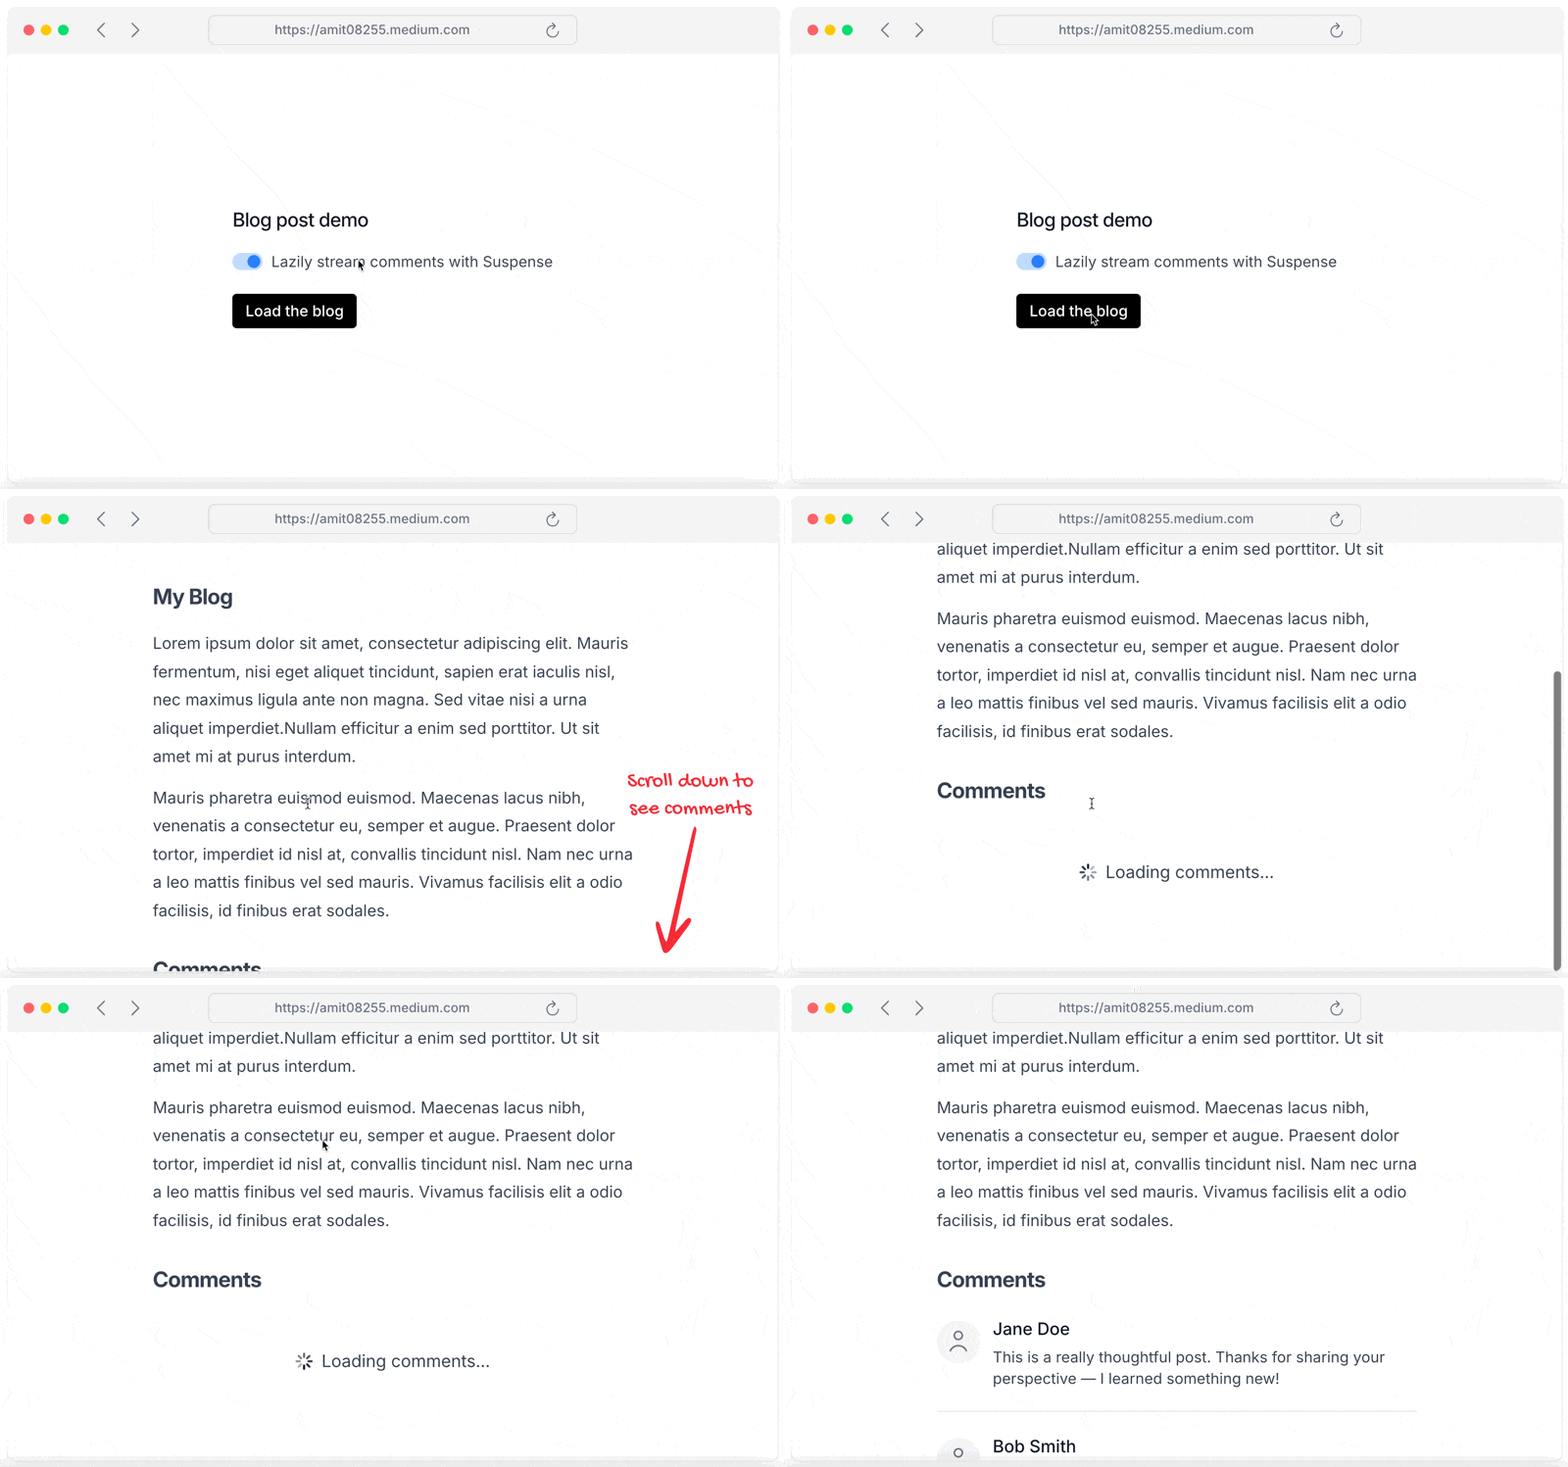
Let’s look at a cool example of a blog. Suppose you are building a blog where you want to load comments on demand. Suspense with the streaming technique allows you to do that. This makes your blog faster for users.

import { Suspense } from "react";
import { cms } from "@/cms";
export async function Page() {
const post = await cms.posts.findFirst({
where: { slug: "streaming-with-suspense" },
});return (
<div>
<h1>{post.title}</h1>
<p>{post.content}</p>
      <Suspense fallback={<span>Loading comments...</span>}>
        <Comments slug="streaming-with-suspense" />
      </Suspense>
    </div>
  );
}
async function Comments({ slug }) {
const comments = await cms.comments.findAll({
where: { slug },
});return (
<ul>
{comments.map((comment) => (
<li key={comment.id}>{comment.content}</li>
))}
</ul>
);
}
This simple implementation boosts up the speed and improves user experience a lot. The comment is loaded without blocking the main content of the page.
This keeps users engaged instead of staring at a blank page.
But wait, isn’t this just lazy loading?
Lazy loading delays component code, but Suspense handles data dependencies with finer control. The streaming is enabled when you wrap a component within Suspense. That’s why streaming is a very powerful technique. I can just wrap the component between Suspense and boom, it’s enabled. No code rewrite required.
The main reason behind it’s simplicity is that the Suspense was built to make a component composable.
Streaming + Composition = ❤️
Suppose you are building an AI chatbot where there is a list of AI models that comes from the API. Instead of blocking the entire UI, you can use Suspense to stream the dropdown component which doesn’t block the entire UI while dropdown is loaded on demand.

import { Suspense } from "react";
import { ModelsListbox, ModelsOptions } from "./client-component";
function ChatBox() {
return (
<form>
<textarea defaultValue="Chat with your favorite AI model..." /><ModelsListbox>
<Suspense fallback={<span>Loading models...</span>}>
<CurrentUsersOptions />
</Suspense>
</ModelsListbox>
</form>
);
}
async function CurrentUsersOptions() {
  const currentUser = await getCurrentUser();
  const models = await getModelsForUser(currentUser);
return <ModelsOptions models={models} />;
}"use client";import {
Listbox,
ListboxButton,
ListboxOption,
ListboxOptions,
} from "@headlessui/react";const defaultModel = {
id: "gpt-mini",
name: "GPT Mini",
isDisabled: false,
};export function ModelsListbox({ children }) {
const [selectedModel, setSelectedModel] = useState(defaultModel);return (
<Listbox value={selectedModel} onChange={setSelectedModel}>
<ListboxButton>{selectedModel.name}</ListboxButton>
<ListboxOptions>{children}</ListboxOptions>
</Listbox>
);
}
export function ModelsOptions({ models }) {
  return (
    <>
      {models.map((model) => (
        <ListboxOption key={model.id} value={model} disabled={model.isDisabled}>
          {model.name}
        </ListboxOption>
      ))}
    </>
  );
}
Here we are splitting the Suspense boundaries to isolate each component’s data fetch. Each Suspense boundary handles its own fallback, making the UI feel snappy and independent. This approach plays nicely with libraries like React Query or SWR, no custom hacks needed.
Rendering and data fetching
I learnt that when I use <Suspense> to stream components with data fetching improves the user experience when I compare the technique with both rendering and fetching data.
In the example I added above, the dropdown component renders immediately, while fetching data for the models. The options are then stream down from the server without blocking any other part of the application.
One edge case I can think of is when user opens the dropdown before options are loaded. When it happens, user see the loading state.
It’s cool that the Suspense allows me to pick which part of the UI should stream and which should render immediately.
Final takeaway
The coolest part of integrating this solution is that it improves user experience and you don’t have to rewrite the application.
Try it out in your application and share your thoughts in the comment.
Thank you. Let’s meet in the next cool hack with React.
Comments
Post a Comment